Monday, April 11, 2011

Pear Tart with Pâte Brisée

By: Jill
When I first learned how to make it during a cooking class given by Helen's Kitchen, I proclaimed it the "best" fruit-based dessert I had ever had. (I also highly recommend taking a class with Helen. I've taken quite a few of them!)
This dessert starts with a pate brisee crust. I've used this crust for numerous recipes and I love how flaky the crust comes out. I have always been disappointed by store-bought pie crusts for their tastelessness, but this recipe is full of flavor.
First, butter is cut into pieces and put in the freezer for ten minutes. This crust has a flaky texture because the butter is not allowed to melt while the dough is being made.
It is also extremely important to have precisely measured flour.
Ice water ensures that all the ingredients stay cold. A small amount of vinegar is also added.
After the mixer has combined the ingredients, the mixture is poured onto a flat surface where it is kneaded together very quickly (again, so the butter does not melt).
This recipe makes two crusts. They are refrigerated for an hour before they are used.
For the pear tart, butter and sugar are melted in a frying pan.
The sliced pears are placed in a circle and sprinkled with pumpkin pie spice and Cognac. Using Bosc pears is also important to this recipe, as they hold their firmness during the baking process.

After the dough is rolled out, it is formed around the cooled pears that are still in the frying pan.
 The result is an amazing tart!
The whole frying pan goes into the oven and, when the tart is cooked, it is "flipped" over into a dish.You must watch the pan very closely to make sure the pears caramelize, but do not burn.

Monday, April 4, 2011

Fancy Nancy Cake!

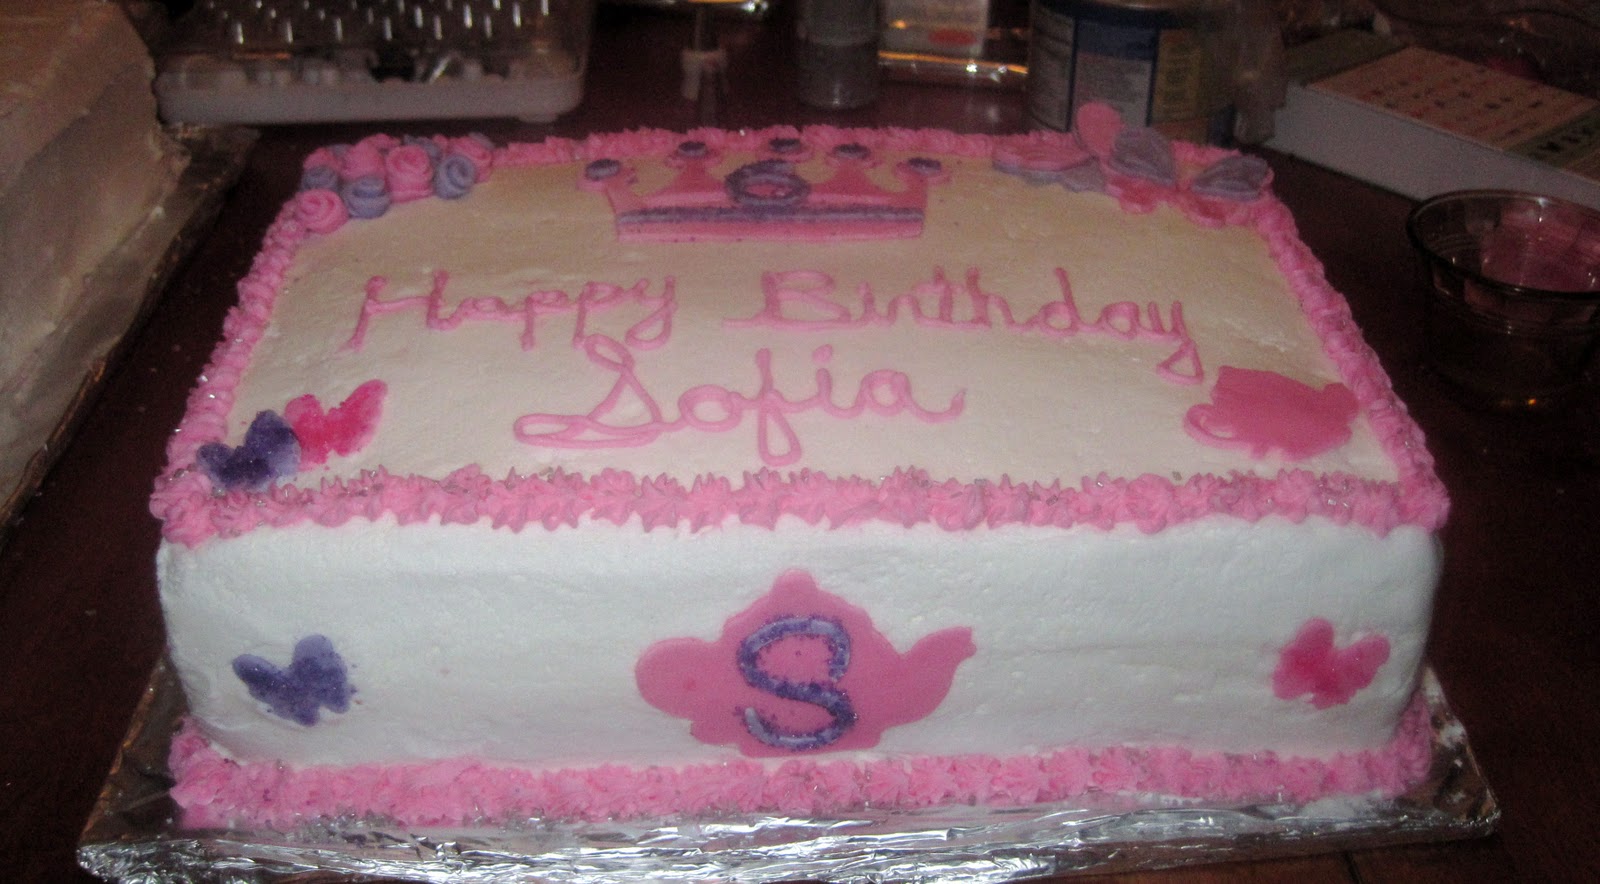
We had made a Mardi Gras themed cake for a little girl who was going to be turning 6 years old. She was having a second party, a family party, the next day and this party theme was “Fancy Nancy.” The requests for this cake were slightly less specific; lots of girly stuff & lots of glitter.
We started out with the cakes, and for this cake we decided to make the batter pink! After baking the cakes and allowing them to cool, we frosted the cake with white buttercream.
We used the gum paste cutting machine again for this cake. We used pink and purple gum paste to created teapots, butterflies, and a tiara. We made lots of tiny roses, by hand, to add to this cake too.
We wrote “Happy Birthday Sofia, in bright pink buttercream and piped on a bright pink star border. We added lots of pink and silver sprinkles to the top of the cake.
 We wanted the tiara to be a focus point for this cake so we added lots of purple accents, lots of glitter, and we added a “6” to the middle of the tiara.
We placed the roses, butterflies and teapots on top of the cake. We also placed some teapots and butterflies to the sides of the cake.

This cake was so fun and girly! We had a lot of fun making this cake because we were able to play around with the cake batter by making it pink and also we were able to make different shaped using the gum paste cutting machine.

Monday, March 28, 2011

Mardi Gras Birthday Cake!

We received an email asking if we would be able to create two different cakes for one lucky little girl who was going to be turning 6 years old. The first cake was for a party with her friends from school and the theme for this party was Mardi Gras.

We were given very specific ideas for this cake. She wanted the cake to have lots of sprinkles, glitter, and a little girl on it. She wanted the girl to be wearing big sunglasses and also a headband with a spring & sign on top that had the number “6” on top.
After baking the cake & allowing it to cool, we frosted the cake with white buttercream.
Using a gum paste/fondant cutting machine, we were able to create a little girl figure using flesh colored gum paste. We then created a dress and shoes for the little girl to be wearing. We made the headband (the spring & the “6”) by hand and sprinkles on lots of green sugar crystals.
We wrote, in bright yellow buttercream frosting “Happy Birthday Sofia” and sprinkled on lots of green, yellow and purple sugar crystals all over the top of the cake.
Using the cutting machine, we made lots of diamond shapes in purple and green gum paste. We applied these diamond shapes to the sides of the cake and finished the cake off with large golden yellow buttercream dots at the top of each diamond.
This cake was so much fun to make. We were given specific instructions for this cake and it turned out beautifully. We were also very excited to be able to use the gum paste cutting machine to create this cake. We will be blogging about the 2nd cake that we were asked to make soon!

Monday, March 21, 2011

Oreo Cupcakes and Oreo-Chocolate-Chip Cookies!

By: Jill
Oreos have to be one of my favorite cookies/ingredients of all time (double stuffed of course). I'm always looking for new ways to incorporate them into my desserts.

Recently, I've tried two new recipes. The first recipe is from Beantown Baker. I made these for my husband's birthday and they were a huge hit! What I liked best about this recipe, is that it was actually a vanilla cupcake and not a more common chocolate cupcake with Oreos incorporated into it.

First, half of an Oreo is placed in the cupcake tin.
The rest of the Oreos are crush and about 3/4 of them are tossed with flour.

The floured Oreos are then mixed with the delicious batter. Flouring the Oreos keeps them from sinking to the bottom of the cupcake.

Yum!
After frosting with cream cheese frosting, the rest of the crushed Oreos are sprinkled on top.

Delicious!
The second recipe was brought to my attention by my sister's boyfriend Steve, so when I went to visit them I decided to make them!

This recipe is, essentially, a cookie within a cookie. (Really, what could be better?)

You start with the chocolate chip cookie portion of the recipe.

Then, an Oreo is encased in the dough.


The finished product was gooey goodness unlike I'd ever eaten before.


They were even good a few days later after microwaving!

Monday, March 14, 2011

Mini Apple Pie!

By: Christine
I wanted to try and make pie crust from scratch, which is something I have never done before. I had made pies in the past using a pre-made pie crust but I felt as though something was missing. I found this recipe, which got really great reviews and decided that it was something I could do!

For the apple filling, I used a combination of a few different recipes since there wasn't just one that seemed to fit the taste I was looking for.

I didn't want to make one whole pie since these were going to be a gift for family members. I wanted each person to have their own individual pie so I cooked them in a standard muffin tin!


The pie crust recipe was very easy and the end result was a delicious, flaky, and buttery crust.  I will be using the pie crust recipe many more times in the future to create some more wonderful pies!