Monday, December 27, 2010

Christmas Eve Cake Pops!

By: Christine
I received many requests from family members and friends that I make cake pops for the two Christmas Eve parties that I was going to be attending. I had made some holiday cake pops last year and they were a huge hit. Bakerella has so many ideas for holiday cake pops and after looking around her website I decided to make reindeer cake pops, snowmen cake pops and Christmas tree cake pops.
I started by baking a small yellow butter cake and a small chocolate cake, then I let them cool completely. Using a spatula, I scraped the cakes out of the pans and into two large bowls. I added a half cup of frosting into each bowl (vanilla in the yellow cake and chocolate in the chocolate cake.) After combining the cake and frosting together, I spooned out a small amount of the mixture and rolled it into a ball. I did this step with the remaining cake/frosting mixture until I had all the cake balls I needed.
I decided to work on the snowmen cake pops first. For these cake pops I used the yellow butter cake balls. I placed a lollipop stick into each cake ball and put them into the freezer for a few minutes to harden. While the pops were in the freezer, I melted white chocolate candy wafers. After the cake pops were slightly hardened, I dunked them into the melted white chocolate and tapped the pop until the white chocolate was smoothly covering the cake ball. I stuck the pop into a Styrofoam block to dry.

While the cake pops were drying, I worked on the snowman’s accessories. I made the snowmen hats using a standard sized Oreo cookie and also a mini Oreo cookie that I “glued” together using chocolate candy wafers. I also made the snowmen noses with mini M&M candies.
I attached the hat & nose to the white cake pop and then drew on, with black frosting, the snowman’s eyes and mouth. These cake pops were complete!
The next cake pop I decided to work on was the Christmas tree pop. These ones I had made before they were so fun and festive, I decided to make them again!
I started with a cake ball that I formed into a cone shape. I placed lollipop sticks into the cones and stuck them into the freezer to harden. While they were in the freezer, I melted green candy wafers. I dunked the cone shaped cake pops into the melted green candy, added some “ornaments” (large round candy sprinkles) and a star on top!
The last cake pop may have been the most difficult; the reindeer cake pop. I started out, as I had before, placing a lollipop stick in the cake ball. After hardening in the freezer, I dunked these cake pops into melted milk chocolate.
I used a mini M&M candy for the nose, pretzels for the antlers, white candy melts and black frosting for the eyes and mouth. These cake pops were complete!

Monday, December 20, 2010

Graham Cracker Chewy Bars!

By: Jill
I decided to make graham cracker chewy bars for a family party because they were different than anything I had done in the past and also easy "finger food" for people to pick up and eat at a party. I don't even remember where I came across the recipe for these bars, but I am so happy that I did! They were a huge hit and even dubbed "the best bars I have ever made".The crust was made of graham cracker, brown sugar, and butter.
The filling was a delicious brown sugar mixture that ended up tasting like caramel after baking.
After baking the crust, the filling is poured into the pan to cook.
Although the original recipe calls for pecans to be mixed in with the filling, I opted for chocolate chips instead!
The result was a gooey, delicious dessert bar!
I will certainly be making these again (maybe for Christmas!) because they were so popular.

Monday, December 13, 2010

Holiday Brownies!

By: Christine
I made three different kinds of brownies for a family Christmas party that I attended yesterday. I used this recipe for these brownies because I wanted a chewy, soft, and fudge like brownie.
The first type was plain, just chocolate. These brownies were so moist and chewy.
The next kind of brownie I made was peanut butter cup. These brownies were filled with lots of mini peanut butter cups! The last type of brownie I made was Oreo candy cane and I added the Oreo cookies right into the batter.
I topped the peanut butter cup brownies with chocolate frosting and sprinkles on more mini peanut butter cups.
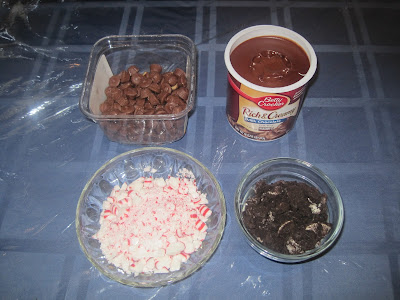
I topped the Oreo candy cane brownies with the chocolate frosting and also added some crushed Oreo cookies and lots of peppermint candies. Then, I drizzled red colored candy melts on top!
This platter was complete and all of the brownies tasted great!

Monday, December 6, 2010

Happy Thanksgiving-Part One!

By: Christine
I wanted to make a variety of fun Thanksgiving treats to bring to the three locations that I was going to be visiting on Thanksgiving day. 
 Pumpkin Cheesecake Bites with Gingersnap Crust
I started out making the gingersnap crust using gingersnap cookies, butter, maple syrup, and brown sugar. Then I made the cheesecake filling. I pressed the crust into the mini muffin tins and poured the filling on top.
I baked the cheesecakes and allowed them to cool.
I drizzled white chocolate on top of the mini cheesecakes and sprinkled on a fun fall mixture of sprinkles.
 "Roasted Turkey" Cupcakes
I wanted to make something really creative and fun for my family for Thanksgiving and, once again, I turned to one of my favorite books: What's New Cupcake.
I decided to make roasted turkey cupcakes using caramel chews, frosting, cereal & pretzels.
After baking one dozen cupcakes, I rolled out the caramel chews flat and cut them into circles.
I spread vanilla buttercream frosting on the top of the cupcake. Then, I placed the caramel circle on top and pinched the sides in to create the turkey body. I rolled the end of the turkey in cereal to get the look of stuffing coming out the end.
Using more cereal that I had mixed with green frosting, I added a bed of lettuce to the sides of the cupcake around the "turkey"
I used pretzel sticks with caramel wrapped around the ends as the drumsticks and attacked the drumsticks to the sides of the turkey. These roasted turkeys were complete and so cute!
 Pilgrim Hat Cake Balls
These pilgrim hat are very similar to the leprechaun hats that I had made for St. Patrick's Day only instead of green hats, I made these hats brown.
I placed the cake balls in a candy mold with melted milk chocolate. Then, using the milk chocolate, I drew circles onto parchment paper. I attached the cake ball from the candy mold to the chocolate circle. Then, I drew on the black band around the edge of the hat and completed these hats with a golden buckle.